If you’re a seasoned four-wheeler, you know to always expect the unexpected. No matter how well equipped your vehicle is, sometimes a failure is inevitable. And tow trucks usually can’t make it to the trails. What sets a small hiccup apart from a ruined trip is your preparedness. The right spare parts and tools can get you back on the trail in no time.
A basic mechanics tool set along with some electrical tape and zip ties will only get you so far. A good rule of thumb is to write down every tool you use during routine maintenance and new installs. Aim to add these tools to your off-road tool kit over time. It’s best to leave your garage tools at home and have a dedicated tool kit for your rig.
A separate bag of spare parts is another essential kit to carry in your rig. Of course, these parts will vary amongst applications and builds. But a few easy parts are spare tires, serpentine belts, fuses, hose clamps, silicone, etc.
A tool and spare parts bag is just the half of it. Ensure you have the knowledge to make the repairs. A service manual for your vehicle is another essential piece of equipment.
Tire related issues are amongst the most common problems that can occur off-road – continue on to learn how to repair a punctured tire, how to reseat a tire bead, and how to fix an air compressor hose in Part 1 of Field Repairs. Stay tuned for Part 2.
TIRE PUNCTURE REPAIR
The most common failure when off-road is a punctured tire. Although everyone should carry a spare tire, some rigs simply are not set up for them. But there have been plenty of occasions where the spare tire is already on.
No matter how you use your rig, an ARB Speedy Seal kit is an item that should be in every off-road vehicle that touches dirt.
RESEATING A BLOWN TIRE BEAD
When off-road, we are all aware that lower tire pressure will enhance traction. If you don’t run beadlocks, you run the risk of airing down too low and potentially blowing a tire bead. But even with beadlocks, there’s a chance of blowing the inner bead.
Usually, a tire bead becomes unseated on only one side. Luckily, the ARB Max Performance Twin Air Compressor, has enough power to reseat most tire beads.
1. Begin by raising the vehicle until the tire spins freely.
2. Clean any dirt, debris, and/or water that has made its way into the tire.
3. Attach the air hose to the tire and fire up your ARB Twin Compressor.
4. You’ll see and/or hear the tire pop into place.
5. Test for leaks.
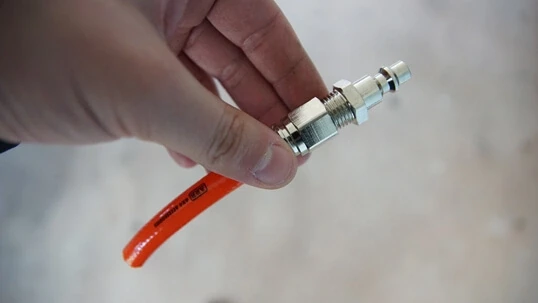
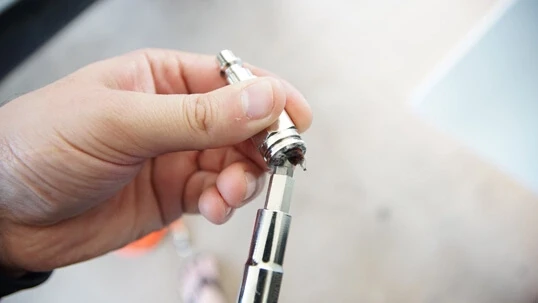
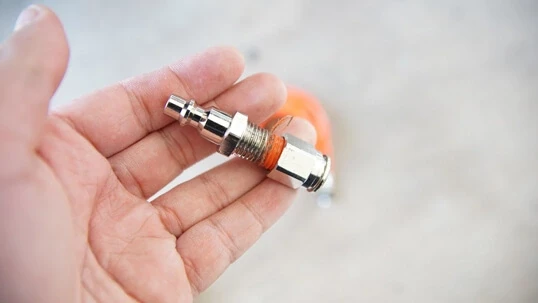
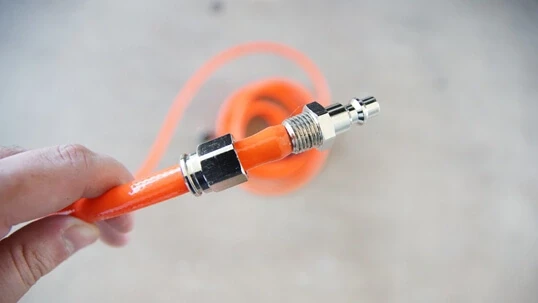
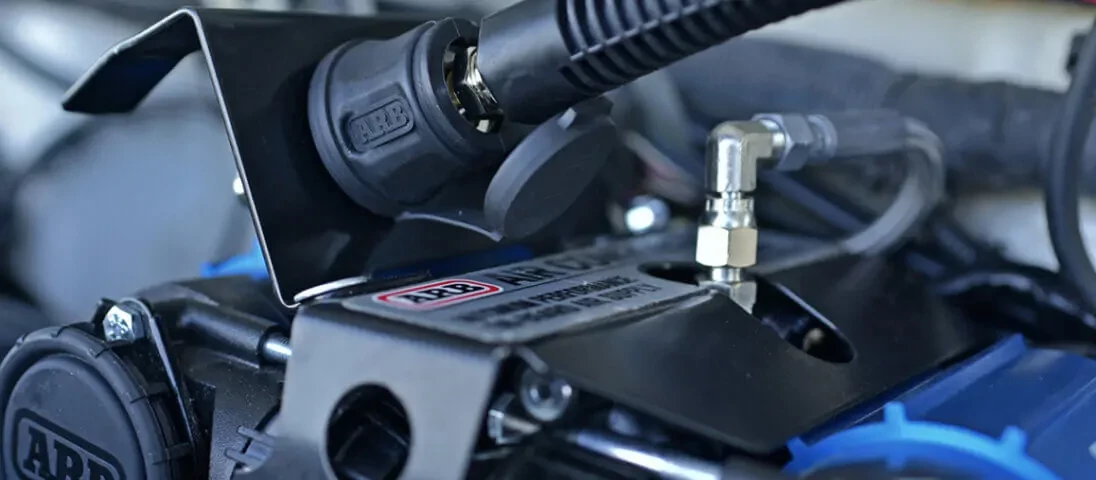
COMPRESSOR HOSE REPAIR
- Locate the leak or puncture. Determine if the failure point is closer to the male or female fitting. In this example, our failure point is closer to the male fitting so we will be taking apart that end. However, the steps are the same for the female fitting.
2. Cut the line at the failure point, ensure you have a straight cut.
3. Lower the protection sleeve.
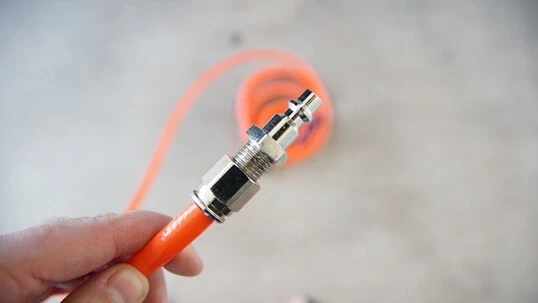
4. Cut the line directly at the compression fitting.
5. Loosen the air fitting from the compression fitting using two 16mm tools of your choice. Hold the compression fitting in place while you remove the air fitting.
6. The air fitting has an additional male end that is inserted into the hose. Use a screwdriver to maneuver the excess hose out of place until the fitting budges.
7. Remove the air fitting from the compression nut.
8. Remove the excess hose that may be on the air fitting or in the compression nut. Ensure both parts are clean.
9. Insert the freshly cut air hose into the compression fitting. Give yourself about 1-2” of extra hose.
10. Insert the air fitting into the hose.
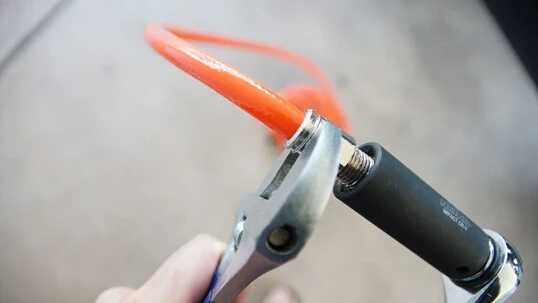
11. Raise the compression fitting. Begin threading the air fitting into the compression fitting.
12. Tighten using 16mm tools.
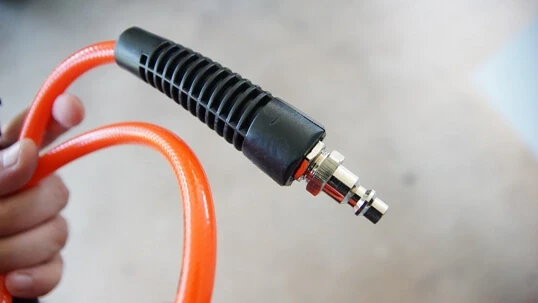
13. Reinsert the hose and fittings into the protection sleeve.
14. Test for leaks. Tighten if needed.
15. Inflate!